


Full Product Details
3 GALLON KIT
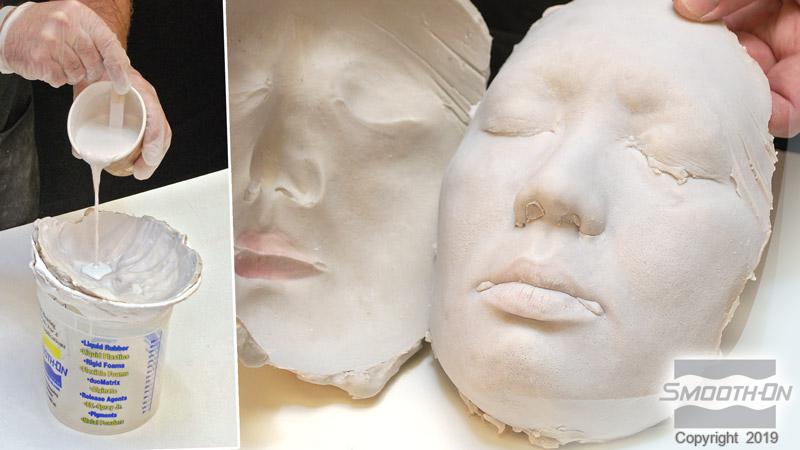
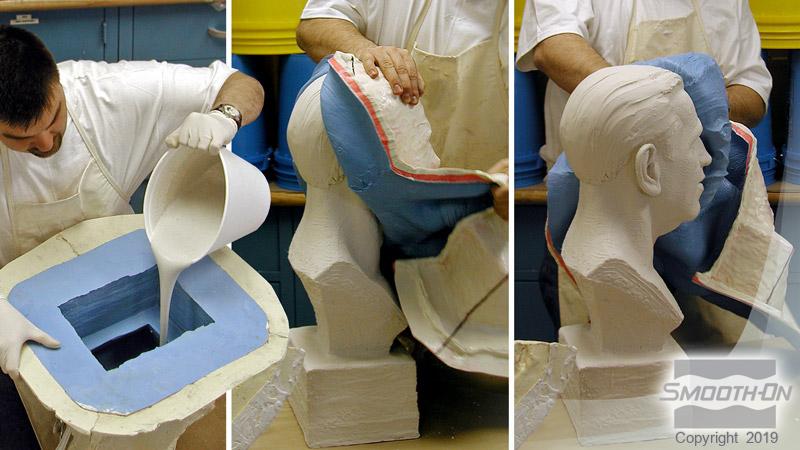
duoMatrix™ NEO is a versatile polymer modified gypsum system that has superior physical and performance properties compared to regular gypsum products. Part A is powder and Part B is liquid.
Features
The mix ratio of NEO is a convenient 2A:1B by volume. NEO is easy to use and can be cast solid, slush cast, rotationally cast, laid up by hand with chopped glass fiber or sprayed. NEO can be thickened using Matrix™ Thickener, accelerated using Matrix™ Accelerator and slowed using Matrix™ Retarder. Fully cured pieces are strong, water-resistant and can be painted, sanded, machined and more.
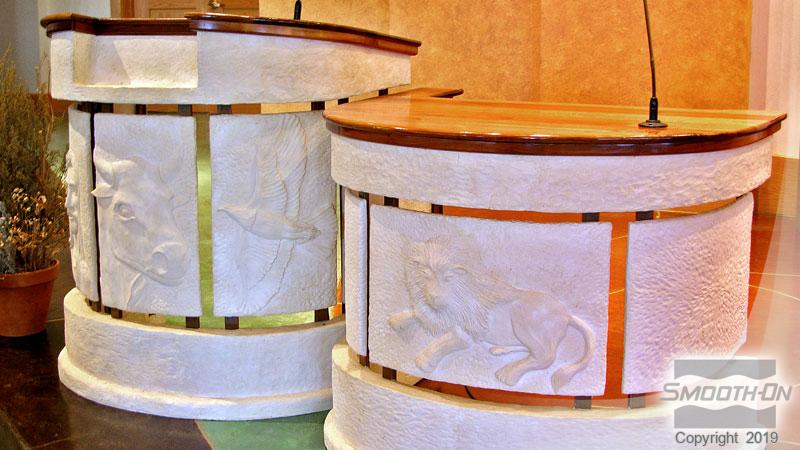
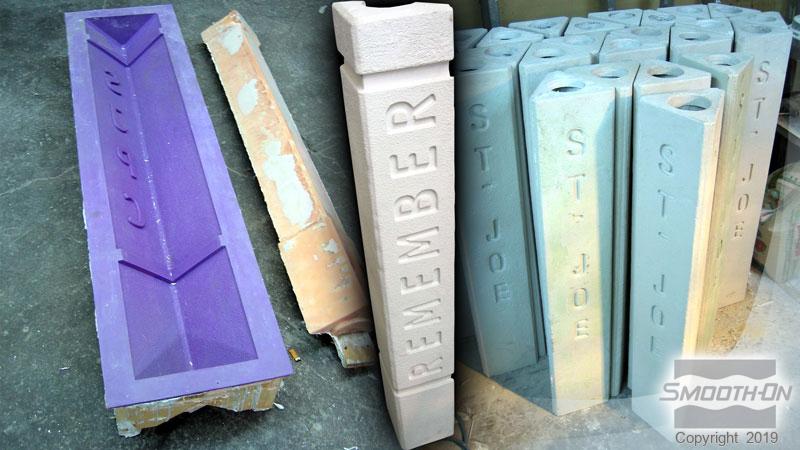
NEO certifies to the highest flame rating (UL-94V-O / ASTM E-84 - Class A), making it suitable for public space applications including creating themed environment elements, architectural elements, sculpture and more.
Versatility – NEO can take you in many creative directions by allowing you to make a variety of finish effects including different colors, metallics, glitters, stone and more (See smooth-on.com/neocolors and smooth-on.com/neoeffects for more information on coloring and adding fillers and powders to NEO to create casting effects).
Flame Rated Certification: https://www.smooth-on.com/assets/pdf/Duo_Matrix_NEO_G_ASTM_E84_Certification.pdf
Instructions
Safety - Store and use material at room temperature (73°F/23°C). These products have a limited shelf life and should be used as soon as possible. Colder temperatures will slow the working/cure time, while warmer temperatures will reduce working times. Store individual components in a dry environment at room temperature. Do not allow Part B - Liquid to freeze. Wear safety glasses, long sleeves and rubber gloves to minimize contamination risk. Mixing containers should have straight sides and a flat bottom.
Mold Preparation - Use the following guide to help determine the best preparation for your mold or casting surface.
| Surface Type | Release Agent | To Reduce Entrapped Air |
|---|---|---|
| Urethane Mold | Ease Release™ 2831 or Sonite™ Wax | Brush in or slush cast surface coat |
| Silicone Mold - Non Paintable Casting | Ease Release™ 2831 or Sonite™ Wax | Brush in surface coat |
| Silicone Mold - Paintable Casting | None | Slush cast surface coat |
| NEO From NEO | Ease Release™ 2831 or Sonite™ Wax | Brush in or slush cast surface coat |
| NEO From Non-Porous Surfaces | Ease Release™ 2831 or Sonite™ Wax | Brush in or slush cast surface coat |
| NEO From Porous surfaces | Sonite™ Wax | Brush in or slush cast surface coat |
Because no two applications are quite the same, a small test application to determine suitability for your project is recommended if performance of this material is in question.
MEASURING & MIXING...
Use Power Drill & Mechanical Mixer to Mix - best results are obtained when powder and liquid components are mixed using a variable speed power drill (set on high) with a mechanical mixer attachment such as a Turbine Mixer or Jiffy Mixer. You will need several measuring and larger mixing containers. To minimize dust inhalation, we recommend that you wear a NIOSH approved dust mask while dispensing and mixing components.
Mix ratio: 100A Powder: 50B Liquid by weight or volume.
Step 1: Shake or Stir Part B – Liquid well. Dispense required amount into large mixing container.
Step 2: Dispense required amount of Part A – powder (twice the weight or volume of Part B) into measuring container. With power mixer set on low at bottom of mixing container, gradually sift powder contents into Part B – liquid.
Step 3 - Drill Mixing: Drill mix components with power drill set on high. Be careful not to splash material. Pot life when drill mixing will be about 30 minutes at room temperature (73°F/23°C) depending on mass and configuration. Drill mix until dry powder is thoroughly dispersed into latex (1 – 2 minutes) and lumps disappear to a creamy consistency. Do not mix more than 2 minutes. The longer you drill mix, the shorter your pot life.
After thorough mixing, NEO is ready to be poured.
POURING...
To Reduce Entrapped Air, Apply a Face Coat of NEO:
“Slush Coat” Method: Pour a small amount of NEO into the mold, and “slush coat” the mold by rotating the mold. Ensure the coating of NEO is even and the surface of the mold is completely coated.
Brush In Method: Apply Sonite™ Wax or Ease Release™ 2831 to surface of the urethane or silicone rubber mold. Wipe away excess release and let dry. Brush a face coat of NEO onto the surface of the mold. This helps to break surface tension and ultimately reduce air bubbles.
Pour Remaining Material - After a face coat is applied, the remaining mixture is slowly poured into the mold. Be aware of your working time—allow for enough time to apply surface coat and pour remaining material.
Further Reducing Entrapped Air - Air bubbles are sometimes a concern with polymer modified gypsums and will vary depending on conditions. There are additional steps you can take to help reduce entrapped air:
1. Vacuuming Material – Required: vacuum chamber and vacuum pump. Prior to pouring material into mold, place mixing vessel in vacuum chamber and subject mixture to 29 hg vacuum for 1 minute. Mixture will bubble, rise, break and fall. After mixture falls, remove from chamber and pour into mold.
2. Pressure – Required: pressure vessel and compressor. After mixture is poured into mold, place mold in a pressure vessel and subject mixture to 60 PSI (4.2 kg/cm2) air pressure for one hour.
HAND LAY-UP TECHNIQUE...
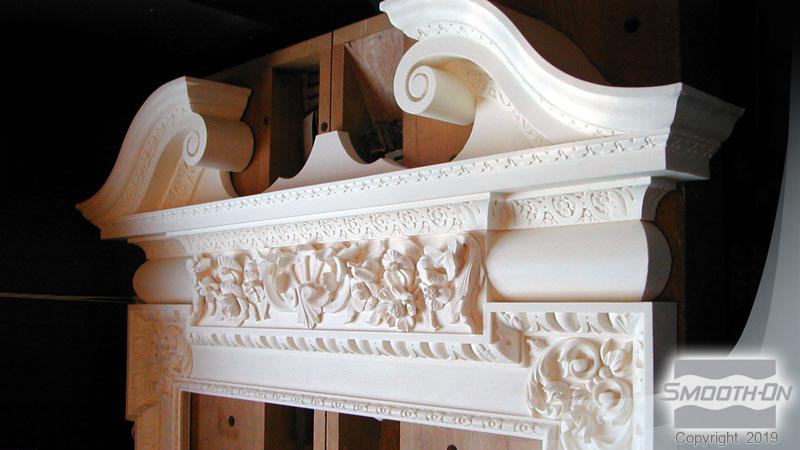
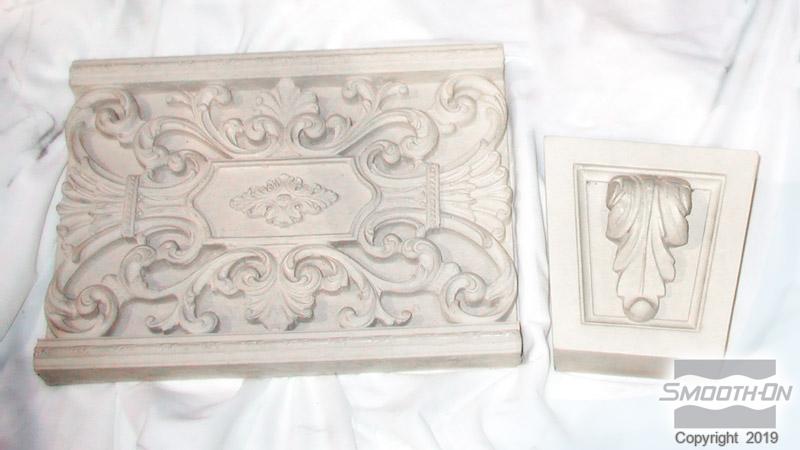
This product can be used to make interior and exterior architectural elements and rigid support shells to reinforce brush on rubber molds. With the addition of glass fibers in the form of fiberglass matting or chopped fibers, NEO can be “layed up” to make elements that are thin, lightweight and exceptionally strong.
For exterior use, applying a sealer or painting the finished casting is recommended. Chopped fiberglass (such as Matrix™ Chopped Glass available from Smooth-On or your Smooth-On distributor) is most commonly used for this application.
Chop strand mat (3/4 ounce or 22 gram available at a fiberglass supply house) is most commonly used for making large architectural panels.
Hand Lay Up Using Fiberglass Matting - Mix NEO and brush a surface or “gel” coat into a mold. Let cure 15–20 minutes or until NEO gels. Mix another batch and dip fiberglass matting into liquid. Squeeze out excess and lay over previous layer.
After a uniform coating is attained, apply another layer of matting and brush again. Apply a minimal amount of NEO—just enough to wet out the surface. Repeat as necessary until 3/8” (1 cm.) thickness is attained. The composite mixture over the face mix should have a minimum thickness of 3/8” (1 cm) and contain 5%–10% glass fiber reinforcement.
Hand Lay Up Technique Using Chopped Glass - Another technique for making strong, lightweight elements is to mix chopped fiber directly into the NEO standard mix. Generally, ¾” “AR” grade chopped fiber works best. “E” grade can also be used. Adding chopped fiber takes much less time than layering fiberglass matting.
How To Proceed…An accurate gram scale to weigh components is necessary. The chopped fiber is added as a percentage of the total weight. Fiber can be added in concentrations of 3% to 12%. For best results, 6% chopped fiber should be added. Mix NEO and brush a surface or “gel” coat into mold. Let cure 15–20 minutes or until material gels.
Next, weigh out 100 Parts of Part A powder, 50 Parts of Part B liquid and 9 parts of chopped fiber. Mix all parts thoroughly and apply mixture with gloved hand or spatula over gel coat.
Additional applications may be required to attain 3/8” (1 cm) thickness.
CREATING FINISHED EFFECTS
NEO can be colored by adding Buddy Rhodes Pure Collection™ powder pigments. See smooth-on.com/neocolors for more information.
Metal powders (bronze, pewter, brass, etc.) can be added to give the look of real metal castings at a fraction of the cost. Casting effects are also possible using Cast Magic™ powders.
You can create marbling and other effects using inexpensive fillers and pigments. Stone effects can be achieved using Quarry Tone™ stone effects powders.
Create long lasting glow in the dark effects by adding Glow Worm™ glow powder.
See separate TB at smooth-on.com/neoeffects for more information on coloring and adding fillers and powders to NEO to create casting effects.
ACCELERATING NEO WITH MATRIX™ ACCELERATOR
Important: Do NOT add Matrix™ Accelerator directly to NEO Part B as it will thicken the material, making it unusable.
Matrix Accelerator Powder mixed with water can be added at different percentages to change the pot life and demold time of NEO. This can be helpful with hand lay-up, rotocasting and slush casting techniques.
Step 1: Add 40 g of Matrix™ Accelerator to 480 g of room temperature water to create a solution Mix until powder is fully dissolved. This can be stored for future use. Accelerator solution must be pre-mixed before using after storage.
Step 2: Mix Part A and B together until powder is fully integrated, about 1 min.
Step 3: Add Accelerator solution while mixing.
Step 4: Continue to drill mix for another 30 seconds. Important: Excessive mixing can shorten the pot life.
| Part A Powder | Part B Liquid | Matrix™ Accelerator (% of Part B by weight) | Pot Life | Demold Time |
|---|---|---|---|---|
| 200 | 100 | 1 Part (1% of Part B by weight) | 10 min. | 50 min. |
| 200 | 100 | 3 Parts (3% of Part B by weight) | 9 min. | 45 min. |
| 200 | 100 | 5 Parts (5% of Part B by weight) | 7 min. | 35 min. |
| 200 | 100 | 10 Parts (10% of Part B by weight) | 5 min. | 30 min. |
SLOWING NEO WITH MATRIX™ RETARDER
You can extend the working time of NEO by adding a very small amount of Matrix™ Retarder to the mix.
Step 1: Add 5 g of Matrix™ Retarder to 240 g of room temperature water to create a solution. Mix until powder is fully dissolved. This can be stored for future use. Retarder solution must be pre-mixed before using after storage.
Step 2: Mix Part A and B together until powder is fully integrated, about 1 min.
Step 3: Add Retarder solution while mixing.
Step 4: Continue to drill mix for another 30 seconds. Important: Excessive mixing can shorten the pot life.
| Part A Powder | Part B Liquid | Matrix™ Retarder (% of Part B by weight) | Pot Life | Demold Time |
|---|---|---|---|---|
| 200 | 100 | 8 Parts (8% of Part B by weight) | 55 min. | 120 min. |
| 200 | 100 | 10 Parts (10% of Part B by weight) | 75 min. | 150 min. |
THICKENING NEO USING MATRIX™ THICKENER
Increase the viscosity of duoMatrix™ NEO by adding a small amount of Matrix™ Thickener to your mix. This will give you better control over the viscosity of your mix and help reduce the number of layers needed when using NEO for hand lay-up, rotocasting or slush casting applications.
Measuring by Weight: Using an accurate gram scale, weigh out 100 Parts B. Matrix™ Thickener is then measured out as a percentage of Part B; reference chart below for consistency. Add Thickener after Part A and B are thoroughly mixed. Continue to mix for about 15 more seconds.
| Part A Powder | Part B Liquid | Thickener (% of Part B by weight) | Pot Life | Cure Time | Consistency |
|---|---|---|---|---|---|
| 200 | 100 | 1 Parts (1.0% of Part B by weight) | 35 min. | 100 min. | Thick |
| 200 | 100 | 2 Parts (2% of Part B by weight) | 40 min. | 105 min. | Thicker |
| 200 | 100 | 2.5 Parts (2.5% of Part B by weight) | 45 min. | 110 min. | Thickest |
Important: Do not excessed 2.5 Parts of Thickener. Overloading the material will thin it back out.
SURFACE PREPARATION FOR SEALING OR PAINTING...
NEO castings must be allowed 24 hours of drying in an environment with less than 50% humidity prior to painting. After drying for 24 hours, release agents must be removed from castings, otherwise paint will not stick.
To remove Ease Release™ 2831 or Sonite™ Wax from a NEO casting, a cleaning solution of 10 Parts warm water (120°F / 49°C) and 1 Part dishwashing detergent should be used. Using a soft nylon brush, scrub over the entire piece two to three times making sure to get into all the surface detail. Remove soap solution from castings by rinsing under warm water and allow them to air dry before sealing or painting.
For Exterior Use, Apply A Sealer - Because the NEO system substantially reduces the water absorption rate (0.25%) of alpha gypsums, elements made with NEO are suitable for exterior use. However, NEO castings must be sealed with a suitable siloxane sealer or concrete / masonry sealer such as Euclid Chemical Baracade Silane 40 WB or Baracade Silane 100 C. Castings can also be painted with an outdoor acrylic sealer or paint.
Pickup available at Kelowna, BC
Usually ready in 2-4 days
Tech Specs
Product information
SDS
3 GALLON KIT
duoMatrix™ NEO is a versatile polymer modified gypsum system that has superior physical and performance properties compared to regular gypsum products. Part A is powder and Part B is liquid.
Features
The mix ratio of NEO is a convenient 2A:1B by volume. NEO is easy to use and can be cast solid, slush cast, rotationally cast, laid up by hand with chopped glass fiber or sprayed. NEO can be thickened using Matrix™ Thickener, accelerated using Matrix™ Accelerator and slowed using Matrix™ Retarder. Fully cured pieces are strong, water-resistant and can be painted, sanded, machined and more.
NEO certifies to the highest flame rating (UL-94V-O / ASTM E-84 - Class A), making it suitable for public space applications including creating themed environment elements, architectural elements, sculpture and more.
Versatility – NEO can take you in many creative directions by allowing you to make a variety of finish effects including different colors, metallics, glitters, stone and more (See smooth-on.com/neocolors and smooth-on.com/neoeffects for more information on coloring and adding fillers and powders to NEO to create casting effects).
Flame Rated Certification: https://www.smooth-on.com/assets/pdf/Duo_Matrix_NEO_G_ASTM_E84_Certification.pdf
Instructions
Safety - Store and use material at room temperature (73°F/23°C). These products have a limited shelf life and should be used as soon as possible. Colder temperatures will slow the working/cure time, while warmer temperatures will reduce working times. Store individual components in a dry environment at room temperature. Do not allow Part B - Liquid to freeze. Wear safety glasses, long sleeves and rubber gloves to minimize contamination risk. Mixing containers should have straight sides and a flat bottom.
Mold Preparation - Use the following guide to help determine the best preparation for your mold or casting surface.
| Surface Type | Release Agent | To Reduce Entrapped Air |
|---|---|---|
| Urethane Mold | Ease Release™ 2831 or Sonite™ Wax | Brush in or slush cast surface coat |
| Silicone Mold - Non Paintable Casting | Ease Release™ 2831 or Sonite™ Wax | Brush in surface coat |
| Silicone Mold - Paintable Casting | None | Slush cast surface coat |
| NEO From NEO | Ease Release™ 2831 or Sonite™ Wax | Brush in or slush cast surface coat |
| NEO From Non-Porous Surfaces | Ease Release™ 2831 or Sonite™ Wax | Brush in or slush cast surface coat |
| NEO From Porous surfaces | Sonite™ Wax | Brush in or slush cast surface coat |
Because no two applications are quite the same, a small test application to determine suitability for your project is recommended if performance of this material is in question.
MEASURING & MIXING...
Use Power Drill & Mechanical Mixer to Mix - best results are obtained when powder and liquid components are mixed using a variable speed power drill (set on high) with a mechanical mixer attachment such as a Turbine Mixer or Jiffy Mixer. You will need several measuring and larger mixing containers. To minimize dust inhalation, we recommend that you wear a NIOSH approved dust mask while dispensing and mixing components.
Mix ratio: 100A Powder: 50B Liquid by weight or volume.
Step 1: Shake or Stir Part B – Liquid well. Dispense required amount into large mixing container.
Step 2: Dispense required amount of Part A – powder (twice the weight or volume of Part B) into measuring container. With power mixer set on low at bottom of mixing container, gradually sift powder contents into Part B – liquid.
Step 3 - Drill Mixing: Drill mix components with power drill set on high. Be careful not to splash material. Pot life when drill mixing will be about 30 minutes at room temperature (73°F/23°C) depending on mass and configuration. Drill mix until dry powder is thoroughly dispersed into latex (1 – 2 minutes) and lumps disappear to a creamy consistency. Do not mix more than 2 minutes. The longer you drill mix, the shorter your pot life.
After thorough mixing, NEO is ready to be poured.
POURING...
To Reduce Entrapped Air, Apply a Face Coat of NEO:
“Slush Coat” Method: Pour a small amount of NEO into the mold, and “slush coat” the mold by rotating the mold. Ensure the coating of NEO is even and the surface of the mold is completely coated.
Brush In Method: Apply Sonite™ Wax or Ease Release™ 2831 to surface of the urethane or silicone rubber mold. Wipe away excess release and let dry. Brush a face coat of NEO onto the surface of the mold. This helps to break surface tension and ultimately reduce air bubbles.
Pour Remaining Material - After a face coat is applied, the remaining mixture is slowly poured into the mold. Be aware of your working time—allow for enough time to apply surface coat and pour remaining material.
Further Reducing Entrapped Air - Air bubbles are sometimes a concern with polymer modified gypsums and will vary depending on conditions. There are additional steps you can take to help reduce entrapped air:
1. Vacuuming Material – Required: vacuum chamber and vacuum pump. Prior to pouring material into mold, place mixing vessel in vacuum chamber and subject mixture to 29 hg vacuum for 1 minute. Mixture will bubble, rise, break and fall. After mixture falls, remove from chamber and pour into mold.
2. Pressure – Required: pressure vessel and compressor. After mixture is poured into mold, place mold in a pressure vessel and subject mixture to 60 PSI (4.2 kg/cm2) air pressure for one hour.
HAND LAY-UP TECHNIQUE...
This product can be used to make interior and exterior architectural elements and rigid support shells to reinforce brush on rubber molds. With the addition of glass fibers in the form of fiberglass matting or chopped fibers, NEO can be “layed up” to make elements that are thin, lightweight and exceptionally strong.
For exterior use, applying a sealer or painting the finished casting is recommended. Chopped fiberglass (such as Matrix™ Chopped Glass available from Smooth-On or your Smooth-On distributor) is most commonly used for this application.
Chop strand mat (3/4 ounce or 22 gram available at a fiberglass supply house) is most commonly used for making large architectural panels.
Hand Lay Up Using Fiberglass Matting - Mix NEO and brush a surface or “gel” coat into a mold. Let cure 15–20 minutes or until NEO gels. Mix another batch and dip fiberglass matting into liquid. Squeeze out excess and lay over previous layer.
After a uniform coating is attained, apply another layer of matting and brush again. Apply a minimal amount of NEO—just enough to wet out the surface. Repeat as necessary until 3/8” (1 cm.) thickness is attained. The composite mixture over the face mix should have a minimum thickness of 3/8” (1 cm) and contain 5%–10% glass fiber reinforcement.
Hand Lay Up Technique Using Chopped Glass - Another technique for making strong, lightweight elements is to mix chopped fiber directly into the NEO standard mix. Generally, ¾” “AR” grade chopped fiber works best. “E” grade can also be used. Adding chopped fiber takes much less time than layering fiberglass matting.
How To Proceed…An accurate gram scale to weigh components is necessary. The chopped fiber is added as a percentage of the total weight. Fiber can be added in concentrations of 3% to 12%. For best results, 6% chopped fiber should be added. Mix NEO and brush a surface or “gel” coat into mold. Let cure 15–20 minutes or until material gels.
Next, weigh out 100 Parts of Part A powder, 50 Parts of Part B liquid and 9 parts of chopped fiber. Mix all parts thoroughly and apply mixture with gloved hand or spatula over gel coat.
Additional applications may be required to attain 3/8” (1 cm) thickness.
CREATING FINISHED EFFECTS
NEO can be colored by adding Buddy Rhodes Pure Collection™ powder pigments. See smooth-on.com/neocolors for more information.
Metal powders (bronze, pewter, brass, etc.) can be added to give the look of real metal castings at a fraction of the cost. Casting effects are also possible using Cast Magic™ powders.
You can create marbling and other effects using inexpensive fillers and pigments. Stone effects can be achieved using Quarry Tone™ stone effects powders.
Create long lasting glow in the dark effects by adding Glow Worm™ glow powder.
See separate TB at smooth-on.com/neoeffects for more information on coloring and adding fillers and powders to NEO to create casting effects.
ACCELERATING NEO WITH MATRIX™ ACCELERATOR
Important: Do NOT add Matrix™ Accelerator directly to NEO Part B as it will thicken the material, making it unusable.
Matrix Accelerator Powder mixed with water can be added at different percentages to change the pot life and demold time of NEO. This can be helpful with hand lay-up, rotocasting and slush casting techniques.
Step 1: Add 40 g of Matrix™ Accelerator to 480 g of room temperature water to create a solution Mix until powder is fully dissolved. This can be stored for future use. Accelerator solution must be pre-mixed before using after storage.
Step 2: Mix Part A and B together until powder is fully integrated, about 1 min.
Step 3: Add Accelerator solution while mixing.
Step 4: Continue to drill mix for another 30 seconds. Important: Excessive mixing can shorten the pot life.
| Part A Powder | Part B Liquid | Matrix™ Accelerator (% of Part B by weight) | Pot Life | Demold Time |
|---|---|---|---|---|
| 200 | 100 | 1 Part (1% of Part B by weight) | 10 min. | 50 min. |
| 200 | 100 | 3 Parts (3% of Part B by weight) | 9 min. | 45 min. |
| 200 | 100 | 5 Parts (5% of Part B by weight) | 7 min. | 35 min. |
| 200 | 100 | 10 Parts (10% of Part B by weight) | 5 min. | 30 min. |
SLOWING NEO WITH MATRIX™ RETARDER
You can extend the working time of NEO by adding a very small amount of Matrix™ Retarder to the mix.
Step 1: Add 5 g of Matrix™ Retarder to 240 g of room temperature water to create a solution. Mix until powder is fully dissolved. This can be stored for future use. Retarder solution must be pre-mixed before using after storage.
Step 2: Mix Part A and B together until powder is fully integrated, about 1 min.
Step 3: Add Retarder solution while mixing.
Step 4: Continue to drill mix for another 30 seconds. Important: Excessive mixing can shorten the pot life.
| Part A Powder | Part B Liquid | Matrix™ Retarder (% of Part B by weight) | Pot Life | Demold Time |
|---|---|---|---|---|
| 200 | 100 | 8 Parts (8% of Part B by weight) | 55 min. | 120 min. |
| 200 | 100 | 10 Parts (10% of Part B by weight) | 75 min. | 150 min. |
THICKENING NEO USING MATRIX™ THICKENER
Increase the viscosity of duoMatrix™ NEO by adding a small amount of Matrix™ Thickener to your mix. This will give you better control over the viscosity of your mix and help reduce the number of layers needed when using NEO for hand lay-up, rotocasting or slush casting applications.
Measuring by Weight: Using an accurate gram scale, weigh out 100 Parts B. Matrix™ Thickener is then measured out as a percentage of Part B; reference chart below for consistency. Add Thickener after Part A and B are thoroughly mixed. Continue to mix for about 15 more seconds.
| Part A Powder | Part B Liquid | Thickener (% of Part B by weight) | Pot Life | Cure Time | Consistency |
|---|---|---|---|---|---|
| 200 | 100 | 1 Parts (1.0% of Part B by weight) | 35 min. | 100 min. | Thick |
| 200 | 100 | 2 Parts (2% of Part B by weight) | 40 min. | 105 min. | Thicker |
| 200 | 100 | 2.5 Parts (2.5% of Part B by weight) | 45 min. | 110 min. | Thickest |
Important: Do not excessed 2.5 Parts of Thickener. Overloading the material will thin it back out.
SURFACE PREPARATION FOR SEALING OR PAINTING...
NEO castings must be allowed 24 hours of drying in an environment with less than 50% humidity prior to painting. After drying for 24 hours, release agents must be removed from castings, otherwise paint will not stick.
To remove Ease Release™ 2831 or Sonite™ Wax from a NEO casting, a cleaning solution of 10 Parts warm water (120°F / 49°C) and 1 Part dishwashing detergent should be used. Using a soft nylon brush, scrub over the entire piece two to three times making sure to get into all the surface detail. Remove soap solution from castings by rinsing under warm water and allow them to air dry before sealing or painting.
For Exterior Use, Apply A Sealer - Because the NEO system substantially reduces the water absorption rate (0.25%) of alpha gypsums, elements made with NEO are suitable for exterior use. However, NEO castings must be sealed with a suitable siloxane sealer or concrete / masonry sealer such as Euclid Chemical Baracade Silane 40 WB or Baracade Silane 100 C. Castings can also be painted with an outdoor acrylic sealer or paint.